Installing agents is the first step to manage servers and computers. Agents can be installed manually or automatically. Installing agents manually on all the computers should be a tiring task, so you can automate the entire agent installation process in bulk. The different methods with which you can perform the agent installation is explained below.
You can install the Distribution Server by following the steps mentioned below:
1. Log in to the web console and navigate to the Agent tab.
2. Choose Remote Offices under Scope of Management on the left tab.
3. Select a Remote Office and click on Download Distribution Server under Download Agent . This should be done on the computer, where the Distribution Server needs to be installed.

4. Follow the installation instructions and the Distribution Server will be downloaded.
1. Log in to the web console and navigate to the Agent tab.
2. Choose Agent installation under Scope of Management on the left tab.
3. Navigate to Other methods and choose the Download option under Command Line tab.

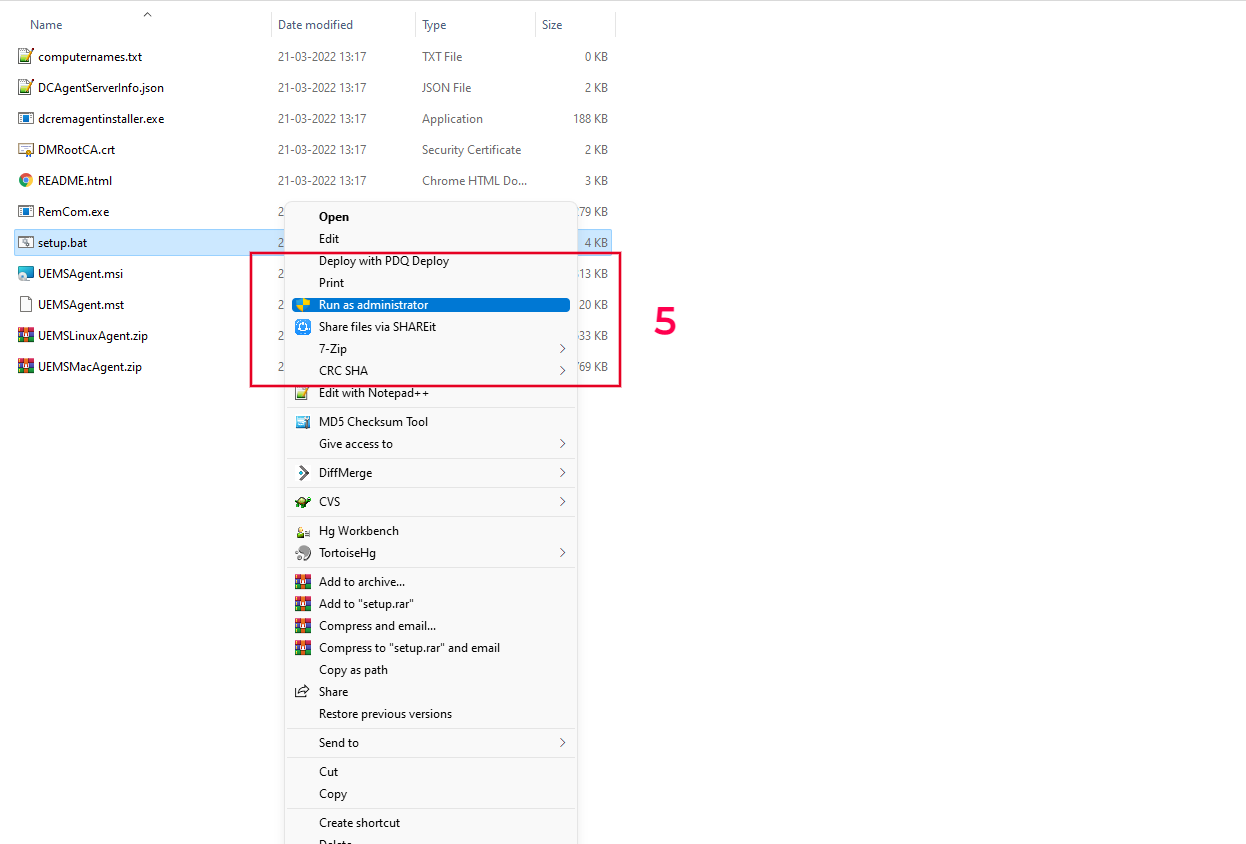
4. From the downloaded zip file, extract these 3 files and paste them in a shared path, which is accessible by all the computers. (Files to be extracted: i) UEMSAgent.msi (PatchManagerPlusAgent.msi for agent versions below 10.0.662) ii) UEMSAgent.mst (PatchManagerPlusAgent.mst for agent versions below 10.0.662) iii) DCAgentServerInfo.json)
5. From the extracted location, Compress the following files using 7-zip
5. Once the download/installation is completed, you can right-click setup.bat and run as administrator to execute it.
6. You will be prompted to choose the below-listed options on the command prompt
You should add computer names or IP address in the computernames.txt file and keep them ready for agent installation.
The admin$\Temp folder of the target machine must be reachable from the computer that we are trying to deploy the agent.
7. You can choose option 3

8. Providing the administrator credentials will invoke agent installations on all the target computers.
If you have already downloaded the Distribution Server, then at step 6 in the command prompt choose option 4.
9. The agents will be installed in the target computers, but in case you have enabled "Waiting for Approval" then, the further communication with the server occurs only if these target computers are approved from the Waiting for Approval tab that is present at Agent -> Computers -> Waiting for Approval.

Note:
You can install the Roaming Agents by following the steps mentioned below:
1. Log into web console and navigate to Agent tab.
2. Choose Remote Offices under Scope of Management on the left tab.
3. Select a Roaming agent and click Download WAN Agent under Download Agent.
For roaming agents, only the Download WAN agent option will be available.
4. Follow the on-screen installation instructions to complete the installation.
5. The agents will be installed in the target computers, but in case you have enabled "Waiting for Approval" further communication with the server occurs only if these target computers are approved from the Waiting for Approval tab that is present at Agent -> Computers -> Waiting for Approval.
Note:
Now you've successfully installed roaming agents on your target computers.
1. Download the Agent Zip file, extract it, and follow the steps given below:
2. Save the .msi, .mst &DCAgentServerInfo.json file in the network share that you've created.
3. Click Start>Run.
4. Enter gpmc.msc.
5. Click OK.
6. Right-click the domain and select Create and Link a GPO here.
7. Specify a name for the GPO.
8. Select the GPO.
9. Note: If you want to install the agent on only a few client computers, follow the steps given below. To install the agent in all your client computers skip these steps.
10. Right-click the GPO and click Edit.
11. Expand Computer Configuration>Policies>Windows Settings>Scripts.
12. Right-click Startup and click Properties.
13. Click Show Files.
14. Drag and drop the InstallAgent.vbs (download the .txt file and rename it as .vbs) UEMSAgent.msi UEMSAgent.mst DCAgentServerInfo.json to this location and Copy the location(Domain name\Sys Vol\Domain name\Policies\{ID}\Machine\Scripts\Startup) and close.
15. In the Startup Properties dialog box, click Add.
16. Browse and navigate to the location (Domain name\Sys Vol\Domain name\Policies\{ID}\Machine\Scripts\Startup) and select the InstallAgent.vbs script or specify the path (copied location) and the script as mentioned below: (Domain name\Sys Vol\Domain name\Policies\{ID}\Machine\Scripts\Startup)\InstallAgent.vbs.
17. Specify the script parameters as mentioned below: UEMSAgent.msi UEMSAgent.mst.
18. Click OK to close the Add a Script dialog box.
19. Click OK to close the Startup Properties dialog box.
20. Close the Group Policy Object Editor.
21. Close the Group Policy Management dialog box.
22. The agents will be installed in the target computers, but in case you have enabled "Waiting for Approval" then, the further communication with the server occurs only if these target computers are approved from the Waiting for Approval tab that is present at Agent -> Computers -> Waiting for Approval.
Note:
You've now installed an agent in client computers using GPO.
You can install agents using local AD by following the steps mentioned below:
Note: Distribution Server must be added and installed manually before proceeding with agent installation. To install Distribution Server manually, refer to Installing the Distribution Server and the agents.
1. Agent -> Computers -> Add Computers button. Select a AD connector and add a domain/workgroup.
2. Click the Select Computers link pertaining to a domain/workgroup. This opens the Select Computers dialog listing all the available computers of the domain/workgroup.
3. Select the computers that have to be managed through Patch Manager Plus Cloud and click Ok. You can also manually specify the computer names instead of choosing them from the list. The selected computers get added to the Selected Computers table in the Add Computers view.
4. Repeat steps 2 and 3 for adding computers from multiple domains/workgroups. Select the "Install Agent Immediately" checkbox to install the Patch Manager Plus agents in the selected computers immediately. When this option is not selected, the computers are only added. You need to install the agents later to manage them.
5. Click done to add the selected computers. All the selected computers get added to the Scope of Management.
The Computers page will list all the computers that are being managed by the Cloud along with the status of the agent installation and the agent version. Agents can also be installed at a later stage, by selecting the computers from Agent -> Computers page and clicking the Install Agent button.
Note: Roaming agents cannot be pushed and installed through the AD.
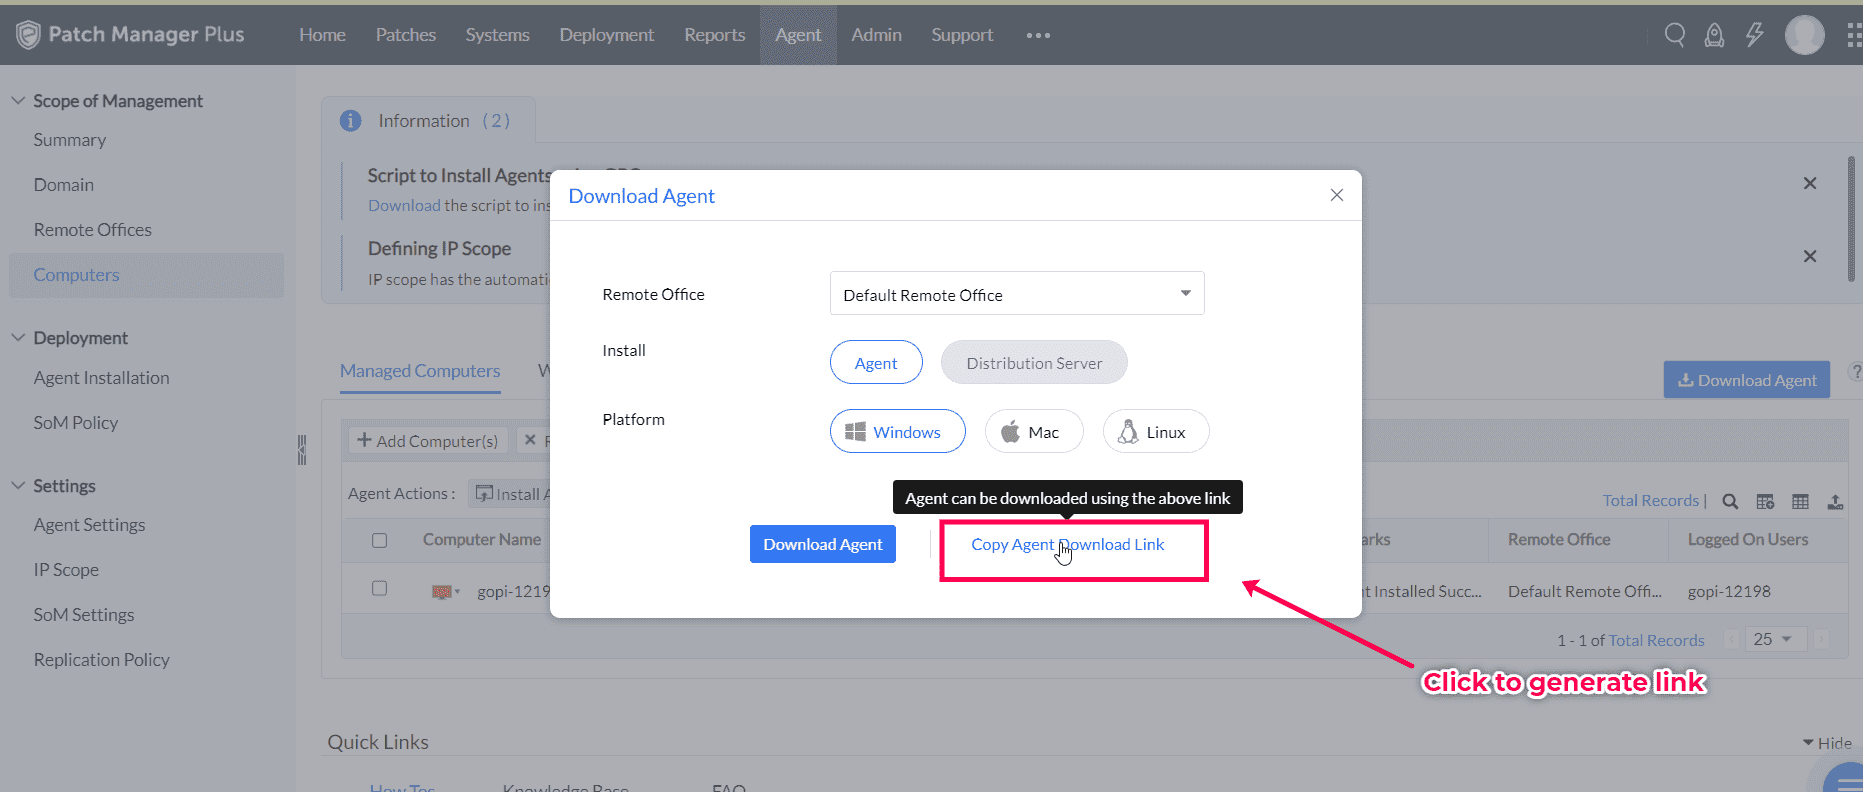
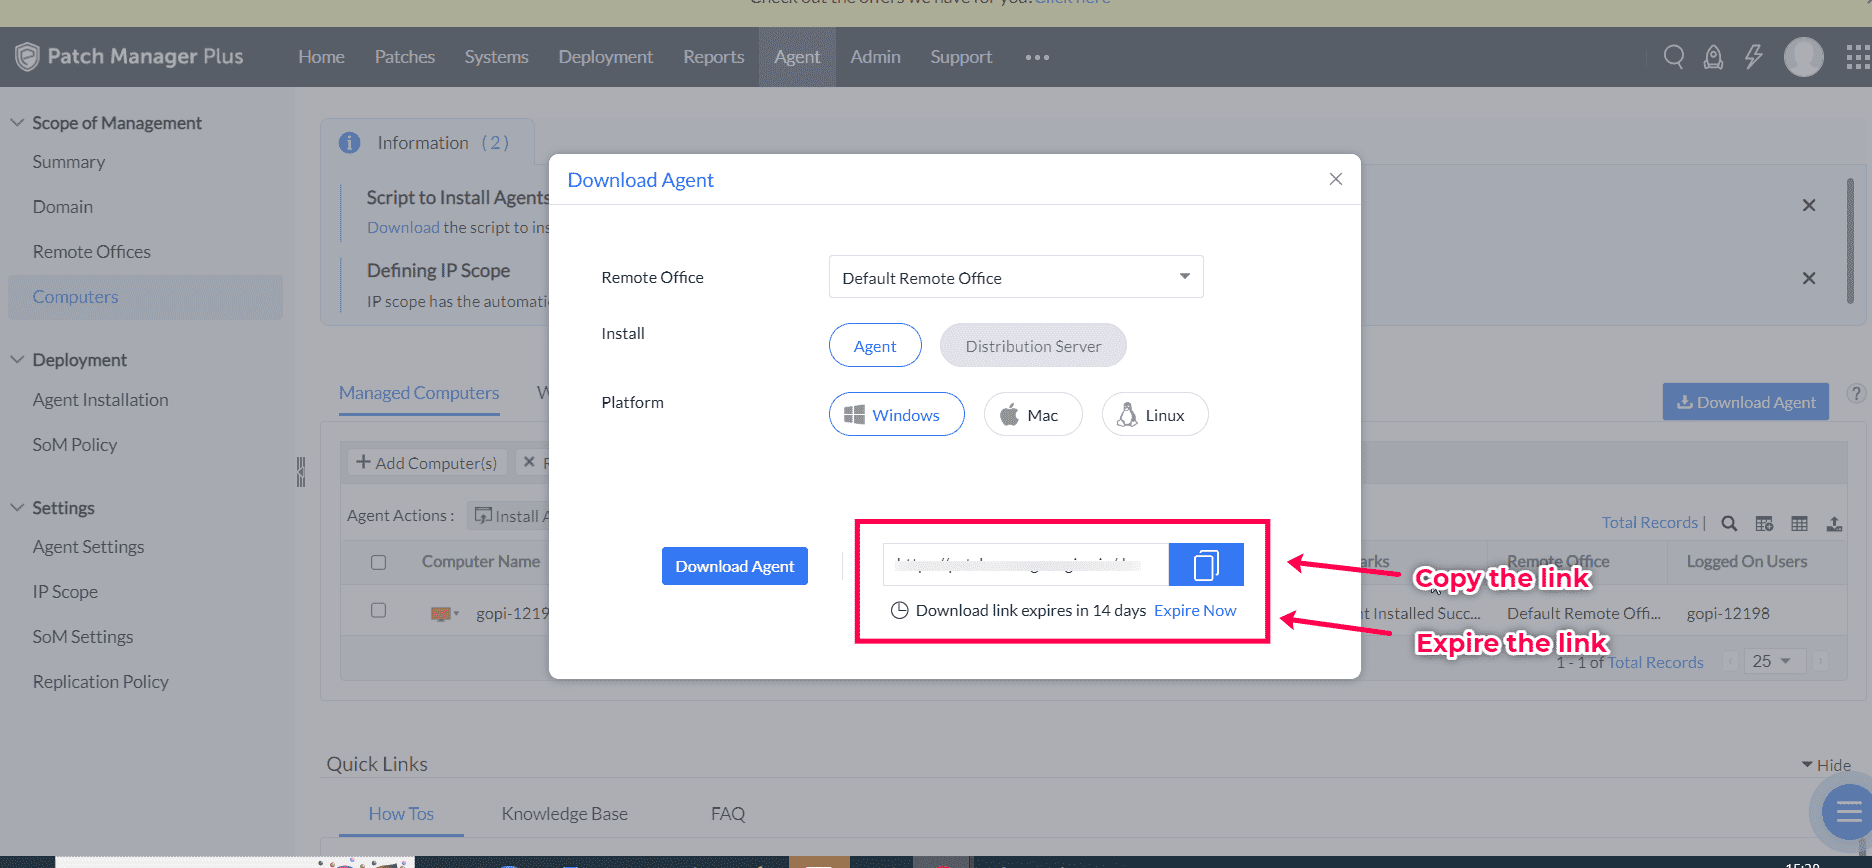
Patch Manager Plus agent can be downloaded from a copied link. The copied link can be shared to end users who could then download and install the agents in their machines. This option is available on clicking Download Agent from the Computers tab. On clicking copy option, the URL for the selected Remote Office will be created. The default expiry time of the URL is 15 days. Using the copied link, agent can be installed:
Directly from the browser:
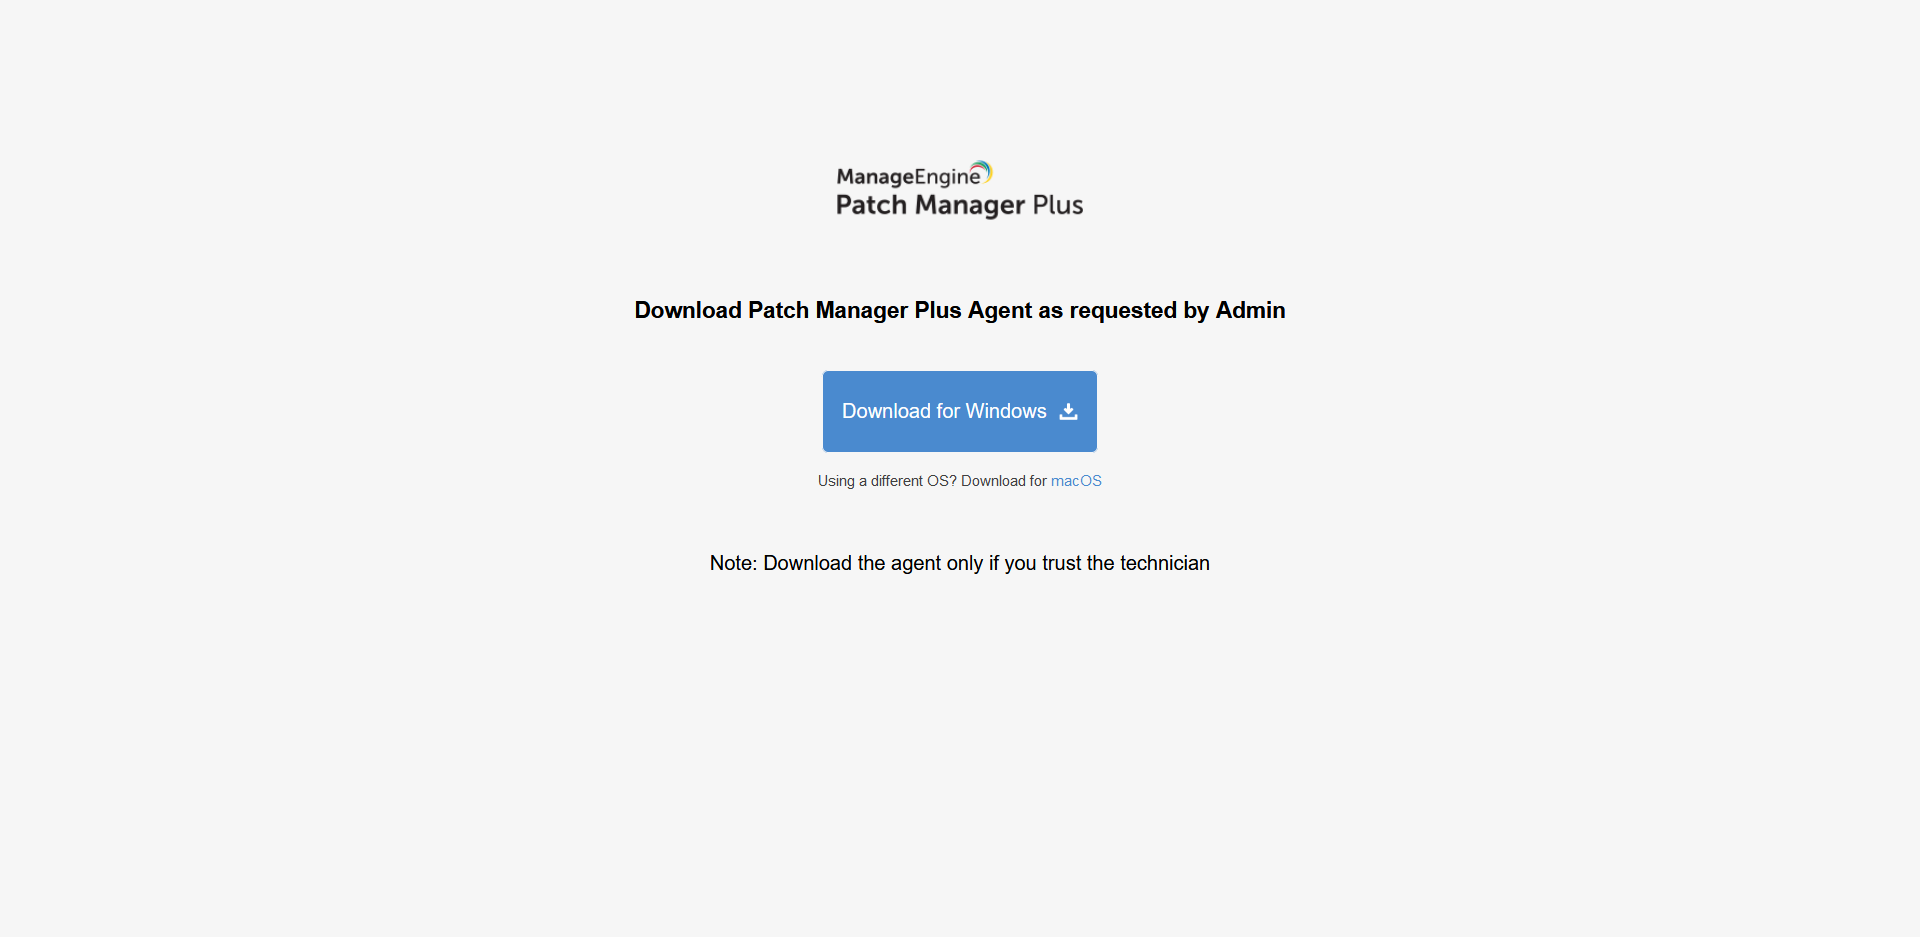
On visiting the copied URL from the browser, the user will be presented with an option to download the agent. The user has to select the OS and the agent download will be initiated. If the user visits the URL from an unsupported browser, an error page will be displayed. If the user visits the copied URL from a supported browser post the expiry time, the error page will be displayed.
From the terminal:
In case the user wishes to download the agent via terminal, he/she can do so, by modifying the copied URL. The format of the copied URL from the console (for US Data Center) is:
https://patch.manageengine.com
For terminal based download, an extra OS parameter is required:
https://patch.manageengine.com
Valid OS parameters are:
Note: OS must be supported for the product for which agent is downloaded.
Agent can be downloaded using CURL. The CURL download command is:
Silent Installation of Agent EXE (Windows):
Once the URL is downloaded, the agent can be installed silently using EXE itself for Windows machines by adding "/silent" argument. The command to install agent is:
DCAgent.exe /silent
Alternatively, the installation process can be automated using a powershell script.
Downloaded User:
For additional security, on enabling waiting for approval option, we can get to know from which technician's shared link, the agent was installed. Based on this, we can approve the computers to be managed.
You can install agents using SCCM by following the steps mentioned below:
1. Go to Agent -> Agent installation -> Other Methods and click Download option under SCCM.
2. From the downloaded zip file, extract these 3 files and paste them in a shared path, which is accessible by all the computers. (Files to be extracted: i) UEMSAgent.msi (PatchManagerPlusAgent.msi for agent version below 10.0.662) ii) UEMSAgent.mst (PatchManagerPlusAgent.mst for agent version below 10.0.662) iii) DCAgentServerInfo.json)
3. Change the shared path location as mentioned in the batch file.
4. Create an SCCM package with this script.
5. Deploy the package.
6. The agents will be installed in the target computers, but in case you have enabled "Waiting for Approval" then, the further communication with the server occurs only if these target computers are approved from the Waiting for Approval tab that is present at Agent -> Computers -> Waiting for Approval.
Note:
a) The Waiting for Approval feature is provided to enhance security and prevent the misuse of the product without Admin's knowledge. At this stage the target computer in which the agent is installed can also be declined by the Admin, thereby preventing further communication with the server.
b) If you Add Computers through the Managed Computers tab, and then install agents in these computers, the systems don't fall under the 'Waiting for Approval' tab.
Read this document to know more on "Waiting for Approval".
You can install agents using Microsoft Intune by following the steps mentioned below:

Note:
The following are the steps to install agents in bulk in AWS Instances

Note: You can also add AmazonEC2RoleForSSM in the already existing IAM role.
For agent versions below 10.0.662, replace UEMSAgent.msi and UEMSAgent.mst with PatchManagerPlusAgent.msi and PatchManagerPlusAgent.mst respectively
Note: